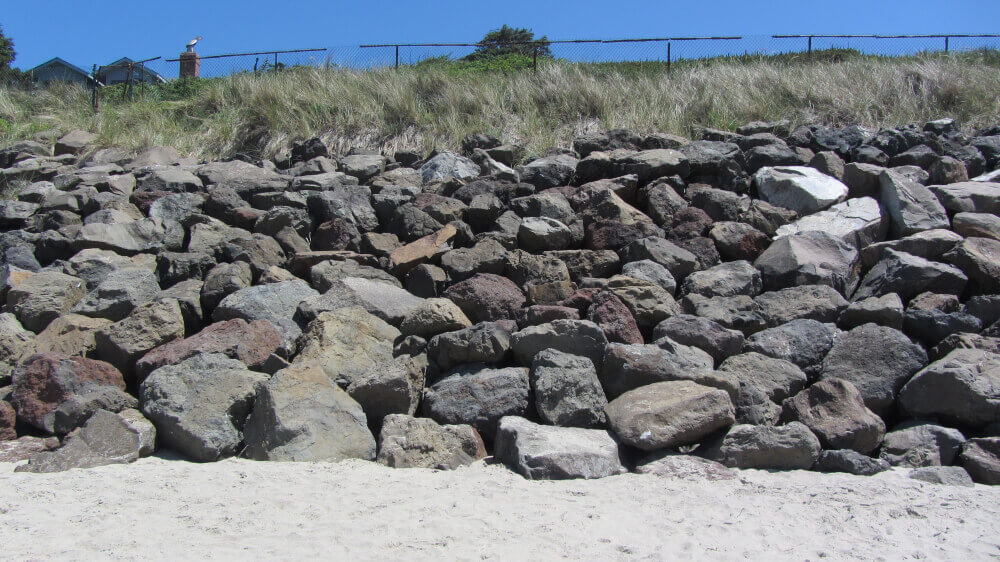
Rip rap, often referred to as rock armor or rubble, is a rock or other material used to armor shorelines, streambeds, bridge abutments, pilings, and other shoreline structures against scour and water or ice erosion. This article provides a detailed breakdown of the process of installing rip rap, ensuring your shoreline remains protected for years to come.

Securing the Permit
Before diving into the installation process, it’s crucial to remember that many regions require a permit to install rip rap. Permit application is often the initial step. Once you have the green light with a permit in hand, you can confidently move on to the subsequent stages of the project without any legal hitches.
Gearing Up
After obtaining the necessary permits, it’s time to assemble all the equipment and materials. This phase involves sourcing the right kind and size of rocks suitable for your shoreline’s needs. Additionally, ensuring you have the proper machinery and tools will make the physical installation smoother and more efficient.
Toe Installation
The toe boulder, sometimes just called the “toe,” is a critical element in the rip rap installation process. This rock is situated at the very bottom, extending the furthest into the lake or water body. Its placement provides a foundation, ensuring the stability of the entire rip rap structure.
Once the toe boulder is appropriately positioned, the subsequent layers are added atop, starting with either geotextile fabric, filter rock, or both.
Choosing Between Geotextile and Filter Rock
Different communities and projects may have varying requirements when it comes to what lies behind the toe boulder. Geotextile fabric acts as a barrier, preventing soil erosion while allowing water to pass through. Meanwhile, filter rock is a layer of smaller rocks which aid in water drainage and provides additional stability to the rip rap structure.
In some cases, the project may demand the installation of both geotextile fabric and filter rock to offer optimum protection and longevity.
Rock Placement
The success of rip rap installation lies in meticulous layering. After setting up the foundational layers behind the toe boulder, you’ll embark on placing larger rocks or boulders up the bank. This is done until you reach the desired elevation for the rip rap’s top.
While doing so, continuous attention is given to the layers underneath – the geotextile fabric and filter rock – ensuring they remain intact and functional.
Finishing Touches: The Soil Cap
Once the rock placement reaches its peak level, the area behind the structure is usually capped off with soil. This process not only provides a neat finish but also ensures the stability of the rip rap. After soil placement, efforts are made to reestablish turf or other ground covers suitable for the area, further enhancing the appearance and health of the shoreline.
Outcome of Proper Installation
Installing rip rap might seem like a straightforward process, but every step, from obtaining permits to the final touches, plays a crucial role in its effectiveness. When executed correctly, as we always strive to achieve, the rip rap will serve as a long-lasting protective solution for your shoreline, guarding against the forces of nature and time.
In Summary

The process of installing rip rap is a calculated sequence of steps, ensuring that the shoreline remains safeguarded against erosion and other natural challenges. With the right approach and attention to detail, this protective measure will stand firm, providing peace of mind for years to come.
If you have more questions about rip rap installation or need professional assistance with your shoreline protection project, please don’t hesitate to contact Natural Environments Corporation today. Our team of experts is always here to help guide you through the process and ensure your shoreline remains protected and beautiful.


